
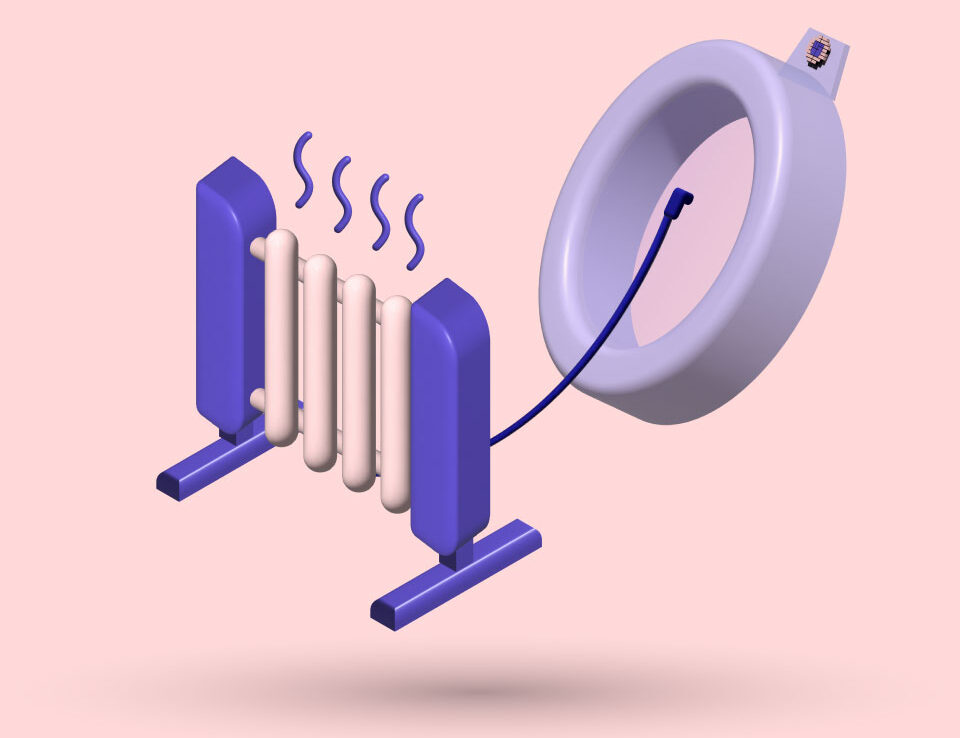
Before the vacuum bell application, I will show you the exercises and stretches created to warm up and loosen up your chest muscles and soften the cartilage and bones.
They are also helpful for pectus posture improvement. The warm-up will take at most 5-10 minutes of your day. Do the exercises slowly, and control the movement.
Dumbbell Hold
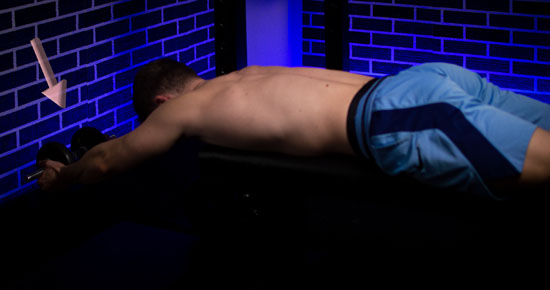
Take a dumbbell with both hands, and lay with it in front of you. Make sure you fully extend your arms and legs.
It is similar to the superman core exercise, but the only difference is that your legs will stay on the ground.
You’ll mostly feel this movement in your chest. Hold the dumbbell for at least 5 seconds, then lower it. Repeat five times.
Drunk Man Stretch
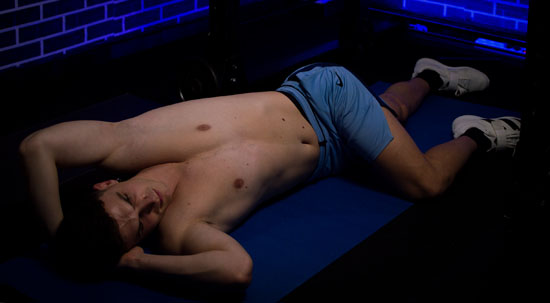
Lay on the right side of your body, with the right leg fully extended and the left leg resting on the ground just in front of the right.
Put your right hand under your head. You should slightly turn your head to the ground. It would be best to place your left hand behind your head with the fingers pointing to the back.
Then, rotate your head toward the ceiling. Feel the stretch in your chest and perform ten deep abdominal breaths. Repeat with the other side.
Dumbbell Pullover
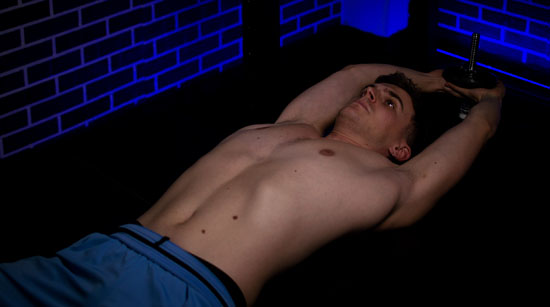
This exercise serves as a warm-up movement for the vacuum bell application. It would help if you did it on a bioenergetic stool.
Grab a light dumbbell and rest your upper back on the towel placed on the stool, with your feet flat on the ground. Hold the weight above your chest, and slowly lower it with straight arms until they become parallel with the floor.
Then, remain in the stretched-out position for about 5 seconds. Bring the weight back to the initial work and repeat it five times. You should feel the stretch in your chest muscles and lats.
Standing Twist Stretch
Stand with your legs set at shoulder-width-apart, right next to the side of a door frame. Put the left palm on it.
With your right arm fully extended, push your hips forward and rotate to the right side as much as possible. Feel the stretch and hold it for about 30 seconds. Repeat with your other side.
Side Stretch
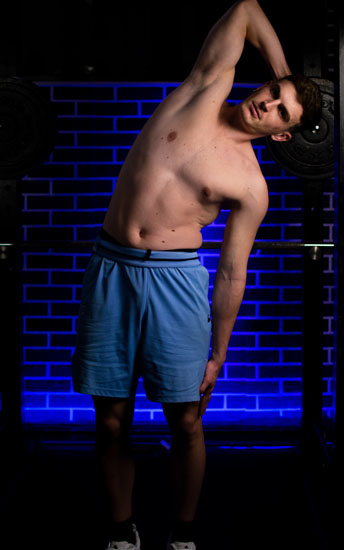
Set your feet at shoulder-width apart. Step on your feet with your legs straight. Take your left arm and put it over your head.
Lean to the right and feel the stretch on your sides. Your right arm should slide slowly on your right side.
With each breath, try to stretch even further. Hold the stretch for about 30 seconds, and repeat with your other side.
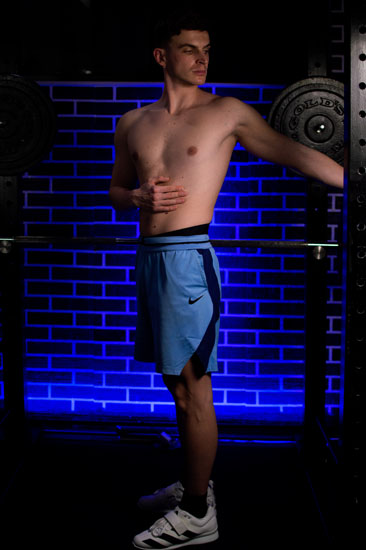
Chest Rotation 1

Hold the left pectoral muscle with your feet set shoulder-width apart with the right hand. Rotate to the left side with your left arm fully extended above your shoulders.
Your head should turn in the direction of your left arm. Squeeze the glutes and keep your hips forward. Hold for about 30 seconds and repeat with the other side.
Chest Rotation 2
Hold the lower ribs’ left side with your right hand with the exact foot positioning as with the first stretch variation. Usually, the left side of the ribs protrudes more because of the pectus excavatum deformity.
If that’s your case, hold the rib flare. Rotate as much as possible to the left side with your left arm fully extended below your shoulders.
Squeeze the glutes to protect your lower back and keep your hips forward. Hold for 30 seconds. Do the same for the other side.
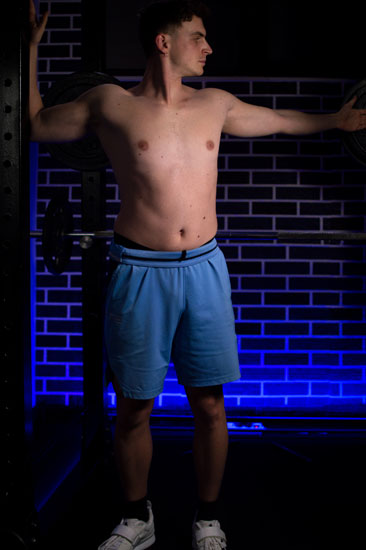
Chest Expansion
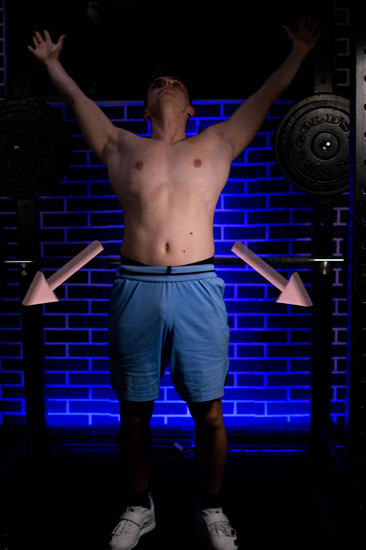
Stand with your feet set shoulder-width apart. Squeeze the glutes to protect your back from hyperextending. Stretch your arms behind, as much as possible, below shoulder level. Don’t hyperextend your lower back. Feel the stretch in your chest.
Hold this for about 30 seconds. Then, take your arms above shoulder level. You’ll feel the stretch in a different spot on the chest. Again, hold for another 30 seconds.
Core Stretching Exercises
The following stretches will help you with the effectiveness of vacuum bell therapy. In my experience, the sternum elevation lasted longer after doing these exercises.
Even though it is not mandatory, I recommend doing these exercises before the vacuum bell application.
Hold the stretches for at least 60 seconds. At first, some of them may be hard to execute, but eventually, you’ll build your endurance to the point where you’ll be able to hold them for longer.
If you practice yoga, you may be familiar with some exercises. I am a massive advocate for pectus excavatum sufferers to do yoga daily. It even helps in vacuum bell therapy.
Bridges
Depending on your flexibility levels, doing one of the bridge’s three variations is essential.
At first, you’ll struggle with it, but you’ll progress in this movement as you try it consistently. It may take a few months to be flexible and robust enough to go from 1a to 1c.
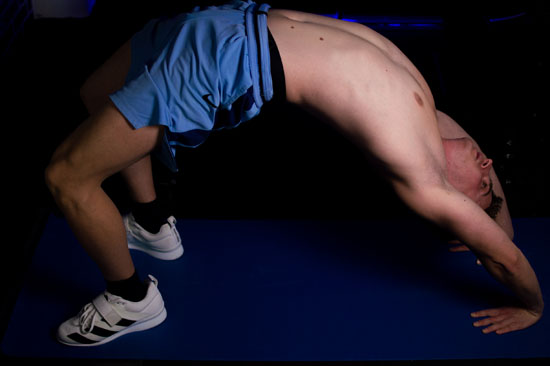
1A – HEADSTAND BRIDGE

First, lay on the ground flat and bend at the knees until your feet touch your butt. Put your hands right next to your head so the fingers of the palm point to you.
Raise the hips as much as possible. You should distribute the weight on your feet, head, and hands. If it is your first time practicing this movement, expect to shake a lot while holding this position.
Set a goal to hold this position for 60 seconds. After you can hold it for 60 seconds, it is time to go to the bridge’s next variation.
1B – HANDSTAND BRIDGE
Repeat the same movement, but try to distribute the weight only on your hands and feet. Elevate the head and try to push your shoulders as much as possible.
This movement is a great strength developer for your shoulders. It mimics the overhead barbell press. When holding this for 60 seconds, do the following more challenging variation.
1C – ELBOW BRIDGE
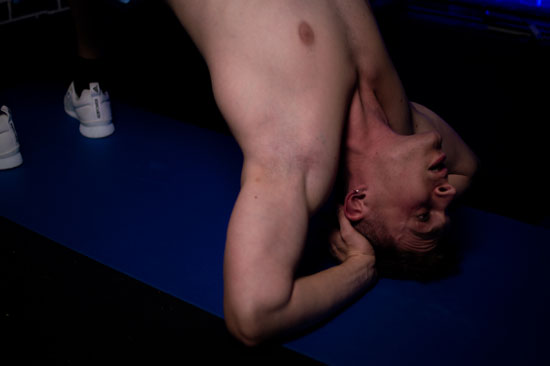
The last and final bridge variation requires a lot of strength and shoulder flexibility. As you get into a headstand bridge, try to shift the whole weight of your body to your feet and head.
Grab the back of your head with your hands, and place the elbows on the ground at a 45-degree angle. Push your hips up, so the weight is supported on your elbows.
Then, you need to straighten your legs and push the body forward, so you feel a more significant stretch on your abdominals and chest muscles.
Set a goal to hold this position for about 60 seconds. This is the final progression of the bridge. Stick to this variation as soon as you can hold 1b for 60 seconds. The goal of 1a and 1b is to progress until you can do 1c.
Sitting Rotation
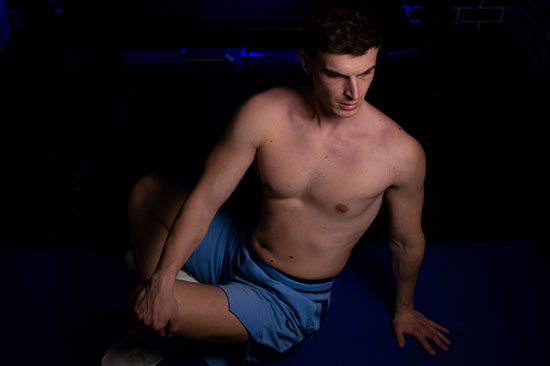
Sit down in a meditation position. Sitting on your left leg, with the knees bent at 90 degrees, would be best.
Your right leg should be in front of your left. It would help extend your right arm so your hand touches your shin area, and your elbow sits comfortably on your thigh.
Rotate with your body and extend your left arm to be placed behind your left hip. Your fingers should point away from your body, and your head should point toward your fingers.
You can push with your right arm on your right thigh for a better rotation. Hold for about 60 seconds. Repeat with your other side.
Bow Pose
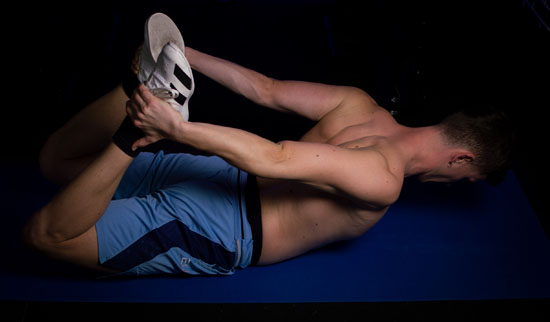
Lay down flat on your stomach and chest. Bend your legs, and grab your feet from the outside with your hands.
Pull your feet upwards so you lift your upper chest and legs as much as possible. Hold your head up and forward. Feel the stretch in your chest, abdomen, and quadriceps.
Half Frog Pose
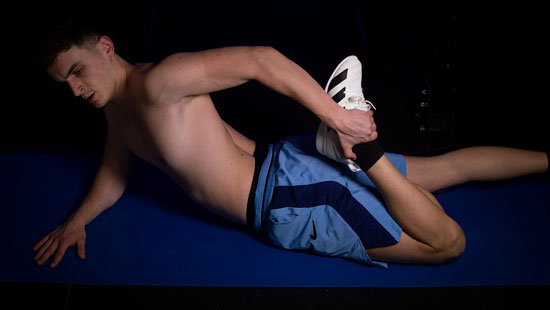
Lay flat on your chest and stomach. Place your forearm at a 90-degree angle right in front of you. Support the weight on your forearm.
Bend your left leg and hold your foot with your left hand from the inside. Pull your leg to your butt, and rotate your chest towards it.
Your head should point in the direction of your leg. Hold the stretch for 60 seconds, and repeat on the other side.
Seal Pose
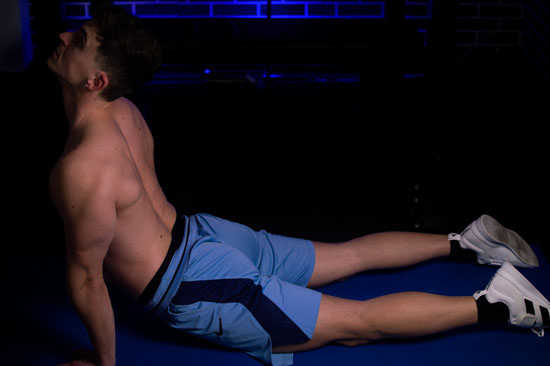
Lay down flat on your stomach. Put your arms right next to your abdomen, with your fingers pointing in front of you. Extend and fully engage your arms, pushing your hips slightly off the ground.
Squeeze the glutes to protect your lower back. Bend back as far as you can while stretching the chest and abdomen. Your head should point to the sky. Hold for 60 seconds.
Camel Pose
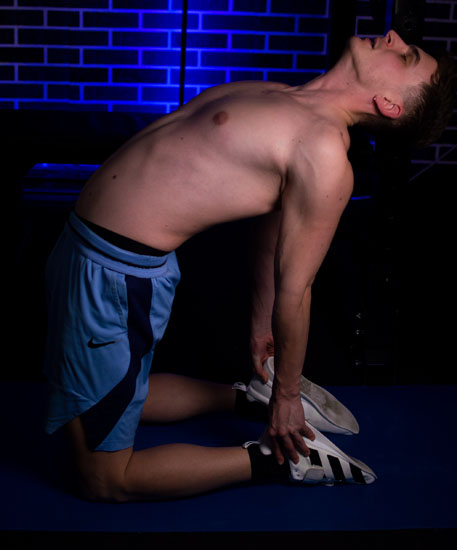
Start kneeling, and slowly lean back until you can grab your heels. Push the hips as forward as you can.
Open up the frontal part of your body and breathe with your diaphragm. Expect to shake and vibrate during this exercise. Hold for 60 seconds.
Conclusion
In this blog post, I wrote about the phases of vacuum bell treatment and what to expect during the first few months of therapy. You’ll be motivated by the fantastic progress in the first months.
Then, the progress will slow down, but the deformity will still improve. It would be best if you were consistent in applying the device.
If needed, you can take a few days’ breaks if you experience skin problems.
Thank you for reading!


