Contents · 8 sections
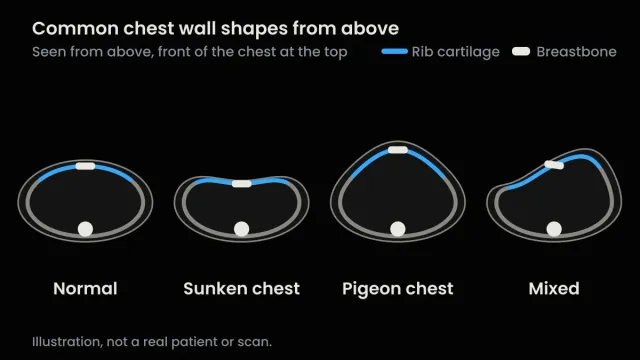
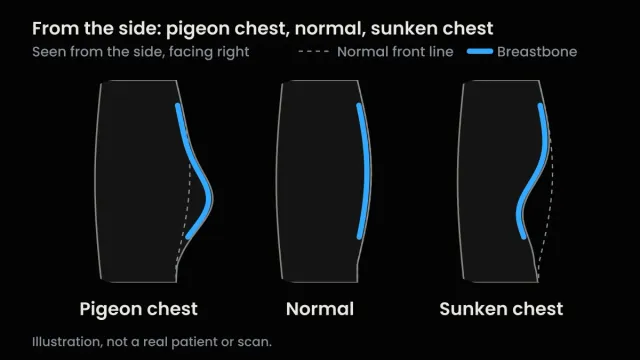
Before you start any non-surgical treatment for pectus excavatum, measure how deep the dent in your chest is. Then keep measuring it, the same way, so you can see what is actually changing instead of guessing in the mirror.
That’s not just my advice. In a 2024 survey of Chest Wall International Group members about the vacuum bell, about three in four measured the depth of the chest before starting treatment, and four in five took photos.
The home method takes a ruler and a few minutes. Lie flat on your back, rest one ruler across the dip, and measure straight down to the deepest point in millimetres. Do it the same way once a month. The number you get is your own tracking number: it tells you whether your chest is changing. It is not a Haller index, and it doesn’t grade how severe your pectus is.
This guide is for anyone with a sunken chest, and for parents measuring a child or teen. I didn’t write my own progress down at first, and I’ll tell you further down why that was a mistake.
Before you start
You need:
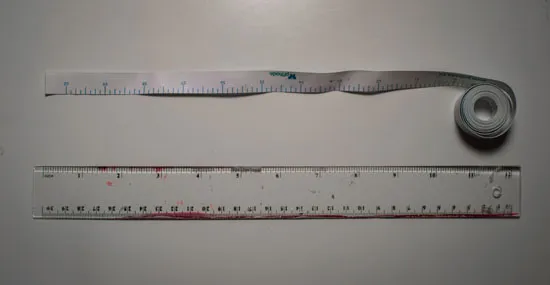
- A straight, rigid ruler long enough to rest on both sides of the dip at once.
- A second ruler or a tape measure to measure down into the dip.
- Pen and paper, or a note on your phone, for the log.
- Your phone camera for the photos.
- A washable marker (optional) to mark the deepest point.
Measure in millimetres (mm). 10 mm is 1 cm, a bit under half an inch. Millimetres show small changes that centimetres would round away.
See a doctor before you rely on home measuring if any of these apply:
- chest pain
- shortness of breath when you exercise, or any other trouble breathing
- symptoms nobody has checked yet
- previous surgery on your chest wall
- Marfan syndrome or Ehlers-Danlos syndrome
- a known heart or lung condition
Boston Children’s Hospital lists shortness of breath on exertion and chest pain among the symptoms older children can have, and the hospital may test the heart and lungs as well as measure the chest. There’s more on what to watch for in my guide to pectus excavatum symptoms. I’m not a doctor, and a ruler can’t rule anything out. Measuring shouldn’t hurt. If it does, stop and get checked.
Measuring a child? The steps are the same. Your child lies flat on their back and breathes normally while you do the ruler work. More on pectus in babies and kids.
How to measure pectus excavatum at home, step by step
1. Pick your time: before the bell
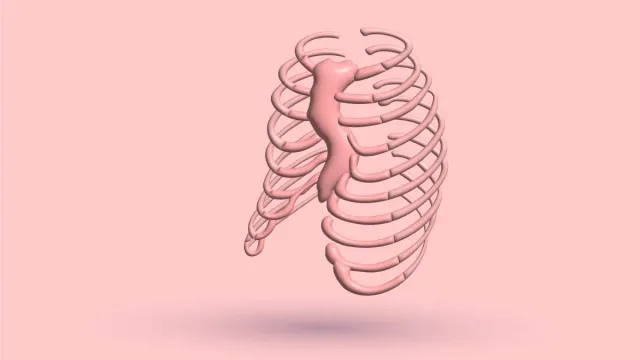
Measure at the same time of day each time. If you use a vacuum bell, measure before your first session of the day. The bell lifts the breastbone (sternum) while it’s on, and that lift stays for a variable amount of time after you take it off. A reading taken after a session tells you about that session, not about your chest.
I recommend first thing in the morning, before the bell goes on.
Done when: you’ve picked a time you can repeat every month, before any bell session.
2. Lie flat on your back
Lie on the floor or a firm bed with your arms relaxed by your sides. It’s the position my PE program teaches.
Standing works too, as long as you always stand. Surgeons are split on this: in that same 2024 survey, about half measured patients standing and about half lying down (the answers add up to more than 100%, so some do both). Neither is wrong. Switching between them is. If you’ve been measuring standing for months, keep standing. If you’re starting fresh, lie down.
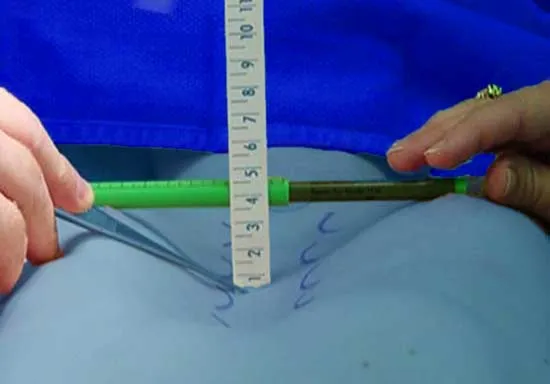
Done when: you’re lying still in the position you’ll use every time, and you’ve noted which one it is.
3. Breathe out normally and stay still
Take a normal breath in, let it out without forcing it, and hold still at the end of that breath out. Don’t measure on a big breath in, and don’t squeeze extra air out. The chest changes shape as you breathe, so the breath has to be the same every time.
You’re ready when you’re relaxed at the end of a normal breath out.
4. Find and mark the deepest point
Run your fingers down your breastbone and find the lowest spot of the dip. That’s the deepest point, the spot you’ll measure to every time. Mark it with a small dot if you have a washable marker.
In some chests the deepest point sits off to one side of the breastbone. Mark where it actually is, not where you think it should be. Measuring a little to one side of it gives a different number.
Done when: you can point to one spot and you’d find the same spot next month.
5. Rest the ruler across the dip, without pressing
Lay the straight ruler across your chest at the level of your mark. Each end should rest on the highest point of the chest on either side of the dip, so the ruler bridges it like a plank over a ditch.
Let it rest with the same light contact every time. Don’t press it in. How hard you press is almost impossible to repeat, and every difference pushes the skin and muscle under the ruler down by a different amount, which shows up in your number. Lying flat, the ruler just sits there.
If you used to press the ruler in, or used to stand, your first readings the new way won’t line up with your old ones. Treat them as a fresh starting point, not as progress or a setback.
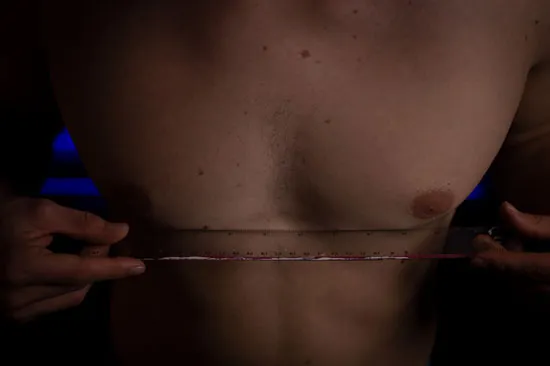
If your lower ribs stick out (flared ribs) or there’s a ridge on one side, the ruler may want to rest on a different bump each time. Pick your landmarks, the same rib or ridge on each side, and write down what the ruler rests on.
Done when: the ruler sits across the dip at the level of your mark, resting on the same high points as last time, with no pressure from your hands.
6. Measure straight down to the deepest point
Hold the second ruler or the tape upright, with its zero end touching the skin at your mark. Read where it meets the underside of the flat ruler. Keep it straight up and down. If it leans, the number grows.
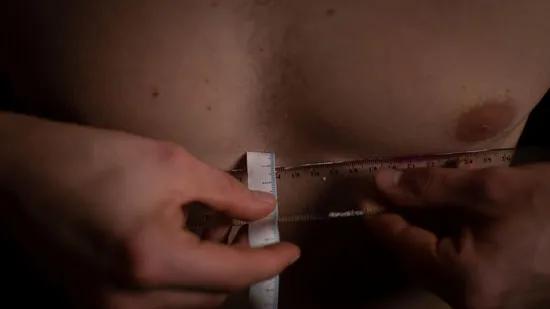
You’re done with this step when you have a number in millimetres.
7. Reset and measure again
Lift the ruler off, breathe normally, then go back through steps 3 to 6. My rule: keep going until you get the same number twice, to the nearest millimetre.
If the readings keep jumping, something in your setup is moving: the breath, the ruler’s resting points, the pressure, or the spot. The table further down covers the usual causes. If they still won’t agree after that, write both down and say so in your notes.
Done when: two readings in a row match.
8. Write it down
Put the number in your log with the date and the conditions you measured under. The log below shows what to record.
Take the same photos every time
A ruler gives you one number at one point. Photos show the shape of the whole chest around it, which a single number can’t.
- Take a photo from the front and one from the side.
- Use the same room, the same light and the same distance from the camera every time. A shelf or a mark on the floor helps.
- Stand the same way and take each photo at the end of a relaxed breath out.
- Take them on the same day as your reading.
Done when: you have a front and a side photo saved with the date, taken under the same conditions as last month’s.
Keep a log (the mistake I made)
Here’s a log you can copy into a notebook or a note on your phone. The first row is a made-up example:
| Date | Time | Position | Breath | Reading (mm) | Before or after bell | Photos | Weight (optional) | Notes |
|---|---|---|---|---|---|---|---|---|
| 3 Nov | 7:30 am | Lying flat | Normal breath out | __ and __ | Before | Front + side | Ruler on ribs, not the flare |
Or keep your log here
Saved only in this browser, on this device. Nothing is sent to us. Use the same browser each month.
The conditions matter as much as the number. A reading only means something next to an earlier one taken the same way, and the log is how you check that it was.
When I started, I didn’t write my progress down. That was a mistake. Some days I didn’t feel like doing anything about my chest, and I started to doubt that fixing it without surgery worked at all. I had nothing of my own to look back at, so I went looking for motivation outside myself.
The research sits somewhere between that doubt and certainty: studies of the vacuum bell report improvement in carefully selected patients, and as of 2024 no randomized trial had compared it with surgery.
What kept me going back then was the gym. When I felt anxious, training was where I went to get out of my head, and my friends noticed the muscle I was building. They complimented the smallest improvements, and that meant the world to me. I was lucky to have them.
But motivation that depends on other people’s comments is fragile. Friends won’t always notice, and nobody can see a few millimetres. A log can. If the psychological side of pectus excavatum is the part weighing on you, a page of your own numbers is a steadier thing to lean on than compliments.
How often to measure
Once a month by default. Never more than once a week.
Why not every day? Because a reading can shift from one day to the next for reasons that have nothing to do with your breastbone: a slightly different position, a different breath, the ruler resting a little harder or on a different spot, or measuring after a bell session. Over a few days, those differences can be bigger than any real change. Measure daily and you mostly measure that noise, and watching it bounce around is discouraging.
In that 2024 survey, most surgeons saw vacuum bell patients for follow-up every 3 to 6 months. Monthly gives you more data points than that without chasing day-to-day noise.
Compare this month with last month, then look at the trend over several months. One reading against the previous one tells you little. Structural change is measured in months and years.
What your number means, and what it doesn’t
Your reading is the distance from a straight line across your chest down to the deepest point of the dip, measured on the skin. It’s a tracking number for your chest under your conditions. If it gets smaller over several months while your method stays the same, something has changed. That’s its job.
It is not one of the numbers doctors use to grade pectus excavatum:
- Haller index: the width of the chest divided by the distance from the breastbone to the spine, measured on a CT scan. In Haller and colleagues’ 1987 report, every patient who needed surgery was above 3.25 and every comparison patient was below it. It can also be estimated from a chest X-ray.
- Correction index: how much of the chest’s front-to-back depth the dent takes away, as a percentage. This also comes from a scan.
Both are measured inside the chest, on the image. Your ruler sits on the outside, on skin, muscle and fat. I go through how the clinical number works in my guide to the Haller index.
Can I measure my Haller index at home?
No. You need a scan for that.
Some home calculators ask you to measure your chest’s width and depth on the skin and divide one by the other. The result looks like a Haller index, but it isn’t on the same scale. In one hospital study of 197 children and teens aged 4 to 18 with pectus excavatum, a surgeon took a skin-to-skin version of the Haller index with calipers and compared it with CT. The caliper ratio that best picked out the children who went on to surgery was 1.83. On CT, the long-standing line is 3.25. Skin measurements run lower.
So don’t hold a home ratio up against CT numbers like 3.25. The comparison can make a chest look milder than a scan would. And that study used a trained surgeon with calipers in one hospital. A ruler at home is rougher still.
Clinicians do have external measures, taken with calipers, that have held up against CT in studies. They’re done in clinic, with set instruments and formulas.
Why there’s no severity scale here
I haven’t found a validated scale that turns a home reading in millimetres into mild, moderate or severe. So I won’t give you one. If you see one, ask where it came from. Compare your number with your own earlier numbers, not with someone else’s.
Your number can change without your breastbone moving
The ruler measures the skin surface, and soft tissue sits between the skin and the bone. In a small study of 15 children and teens using the vacuum bell, the depth of the dent improved in 14 of them, by 8.7 mm on average, while their Haller index barely changed. The fat under the skin had thickened in 11 of them, and the authors put the improvement down to that. The author of that 2024 survey paper raised doubts about the study’s small numbers and how its patients were chosen, so treat it as a caution, not a rule.
Gaining or losing weight changes that same soft tissue, and with it the surface the ruler rests on. Write your weight in the log if it’s moving.
None of this makes your reading useless. It means a better number is good news worth checking: against your photos, and with a doctor if you’re making decisions about treatment.
If a reading looks wrong
| What happened | Why it changes the reading | What to do |
|---|---|---|
| You measured after a bell session | The lift after a session lasts a variable time | Measure before your first session of the day |
| You switched between lying and standing, or measured on a different breath | Position and breathing change the shape of the chest | Use the position and breath in your log, every time |
| The ruler rested on a different ridge (a flared rib, a muscle edge) | The straight line you measure from moved | Rest it on the landmarks you noted last time |
| You pressed the ruler in | Pressure pushes soft tissue down by a different amount each time | Let the ruler rest with light contact |
| Your weight went up or down | The soft tissue under the ruler changed | Note your weight and lean on your photos |
| The deepest point is off-centre, or the chest is rotated | A small shift sideways gives a different number | Mark the spot and measure that exact spot |
If two readings in one sitting won’t match, go down this list before you write anything down.
What to do with your number
If you want a Haller index or an actual severity grade, that takes a doctor and a scan. Take your log and photos along. They show how your chest has behaved over time, which a single appointment can’t.
If a doctor recommends surgery, take it seriously. Surgery is a real option for the right person, and you can read how it works in my guide to pectus excavatum surgery.
If you’re going the vacuum bell route, the same depth measurement is one of the inputs for choosing a bell size.
And if you’re not sure where you stand yet, take my free 1-minute quiz. It asks how severe your pectus is, and there’s a “not sure” option if you haven’t measured or been assessed. Have your first reading and photos to hand when you take it, and put the next measurement in your calendar for a month from today.
Reading about the condition is one thing. Knowing which one you have, how severe it is and what to do first takes about a minute.
- Your condition named, not guessed
- A severity read you can act on
- The exact next step for your case

This article is for educational purposes only and does not constitute medical advice. Always consult a qualified healthcare professional before starting any treatment plan. View full disclaimer →